Zero Keyframe Animation
Animation
•
Motion script
2017
Creating an infinitely looped animation in After Effects without any keyframes, using Expression Scripts.
"No keyframes were harmed during the making of this film!"
The original idea - Oscillations

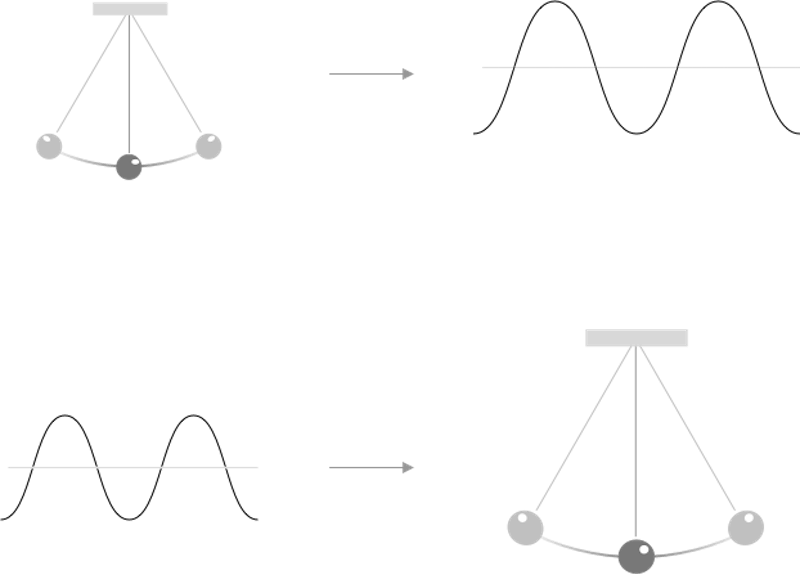
The whole idea of this animation is around oscillations. If looked at each individual parts of the face, they all are moving or rotating from one state, reach another state and comes back to the original state. Means they are all oscillating in terms of rotation or position. For this animation to be looped infinitely, these movements have to be repeated at regular intervals and have to reach back to the original state at the end of every interval. Oscillations generate wave functions. On the contrary, why not use a wave function to drive oscillations?
To start with, let's build a simple sine function

After effects expressions gives us the power to generate values according to mathematical functions. Here in this case a sine function will be the perfect one. It alternates between negative and positive values and repeats at regular time intervals. A sine function that continuously returns values from -10 to 10 at intervals of 60 frames (2 secs). Another sine function which is 2x faster is also made from the original function; for faster moving parts of the face such as the eye. The sine functions are also multiplied by an easing function for smooth movements of the oscillations.
Constructing the face

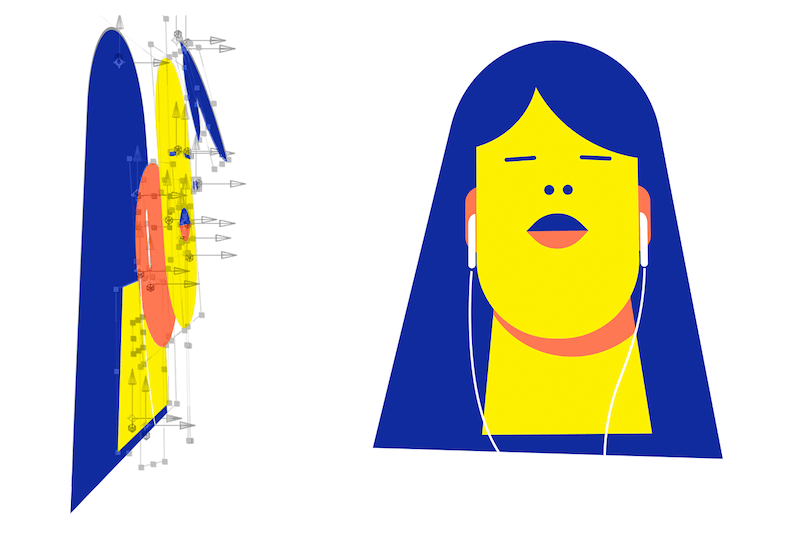
The face is constructed as different layers arranged in the 3D space, slightly tilted (on x axis) and spaced a little apart from one another. This is to create an illusion of depth at the time of motion. Anchor points are placed for each element according to the required movement in the final output.
Now, let's plug in the functions to the face layers.
Now all the parts are taking values from the sine function and oscillate with those values in terms of rotation or translation. But every part is moving independently on their own. There needs to be a parent-child relation between the parts of the face.
Rigging the parts
We have connected all the parts together. Now movement of each part is also dependent on it's parent's movement. Though the rigging part is done here, still all the movements happen at the same scale at the same point in time; because values from the sine function is directly mapped to every part without any change. The values from the sine function need to be modified differently for each part.
Let's fix the values

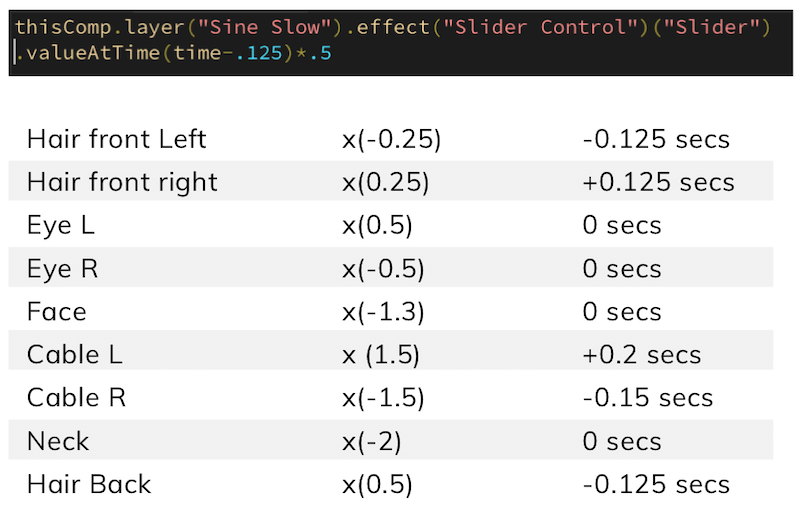
The values for movement of each part are either multiplied, divided or inversed with different numbers according the required movement. And to achieve follow throughs and anticipations, the movements are slightly offset in time backward and forward. Now the sine function drives different parts at different scales, asynchronously.
Done! One sine wave to drive 'em all.
Adding some controls for fun
Since everything here is driven by the sine wave, giving control over the wave parameters (frequency and amplitude) adds scalability to the speed and amplitude of the animation. Slider Controls in After Effects comes as a handy way to do this.
No Keyframes Were Harmed During The Making Of This Film!


